Manual Installation
After application is installed, a store owner will receive an email with Punchout Cloud credentials. Depending on preferred format selected during onboarding step, the owner will receive cXML or OCI credentials and punchout URL.
Punchout Session
A Punchout Session is a buyer session established by an eProcurement system (See: Supported Platforms) or our punchout simulator.
Shopping Cart
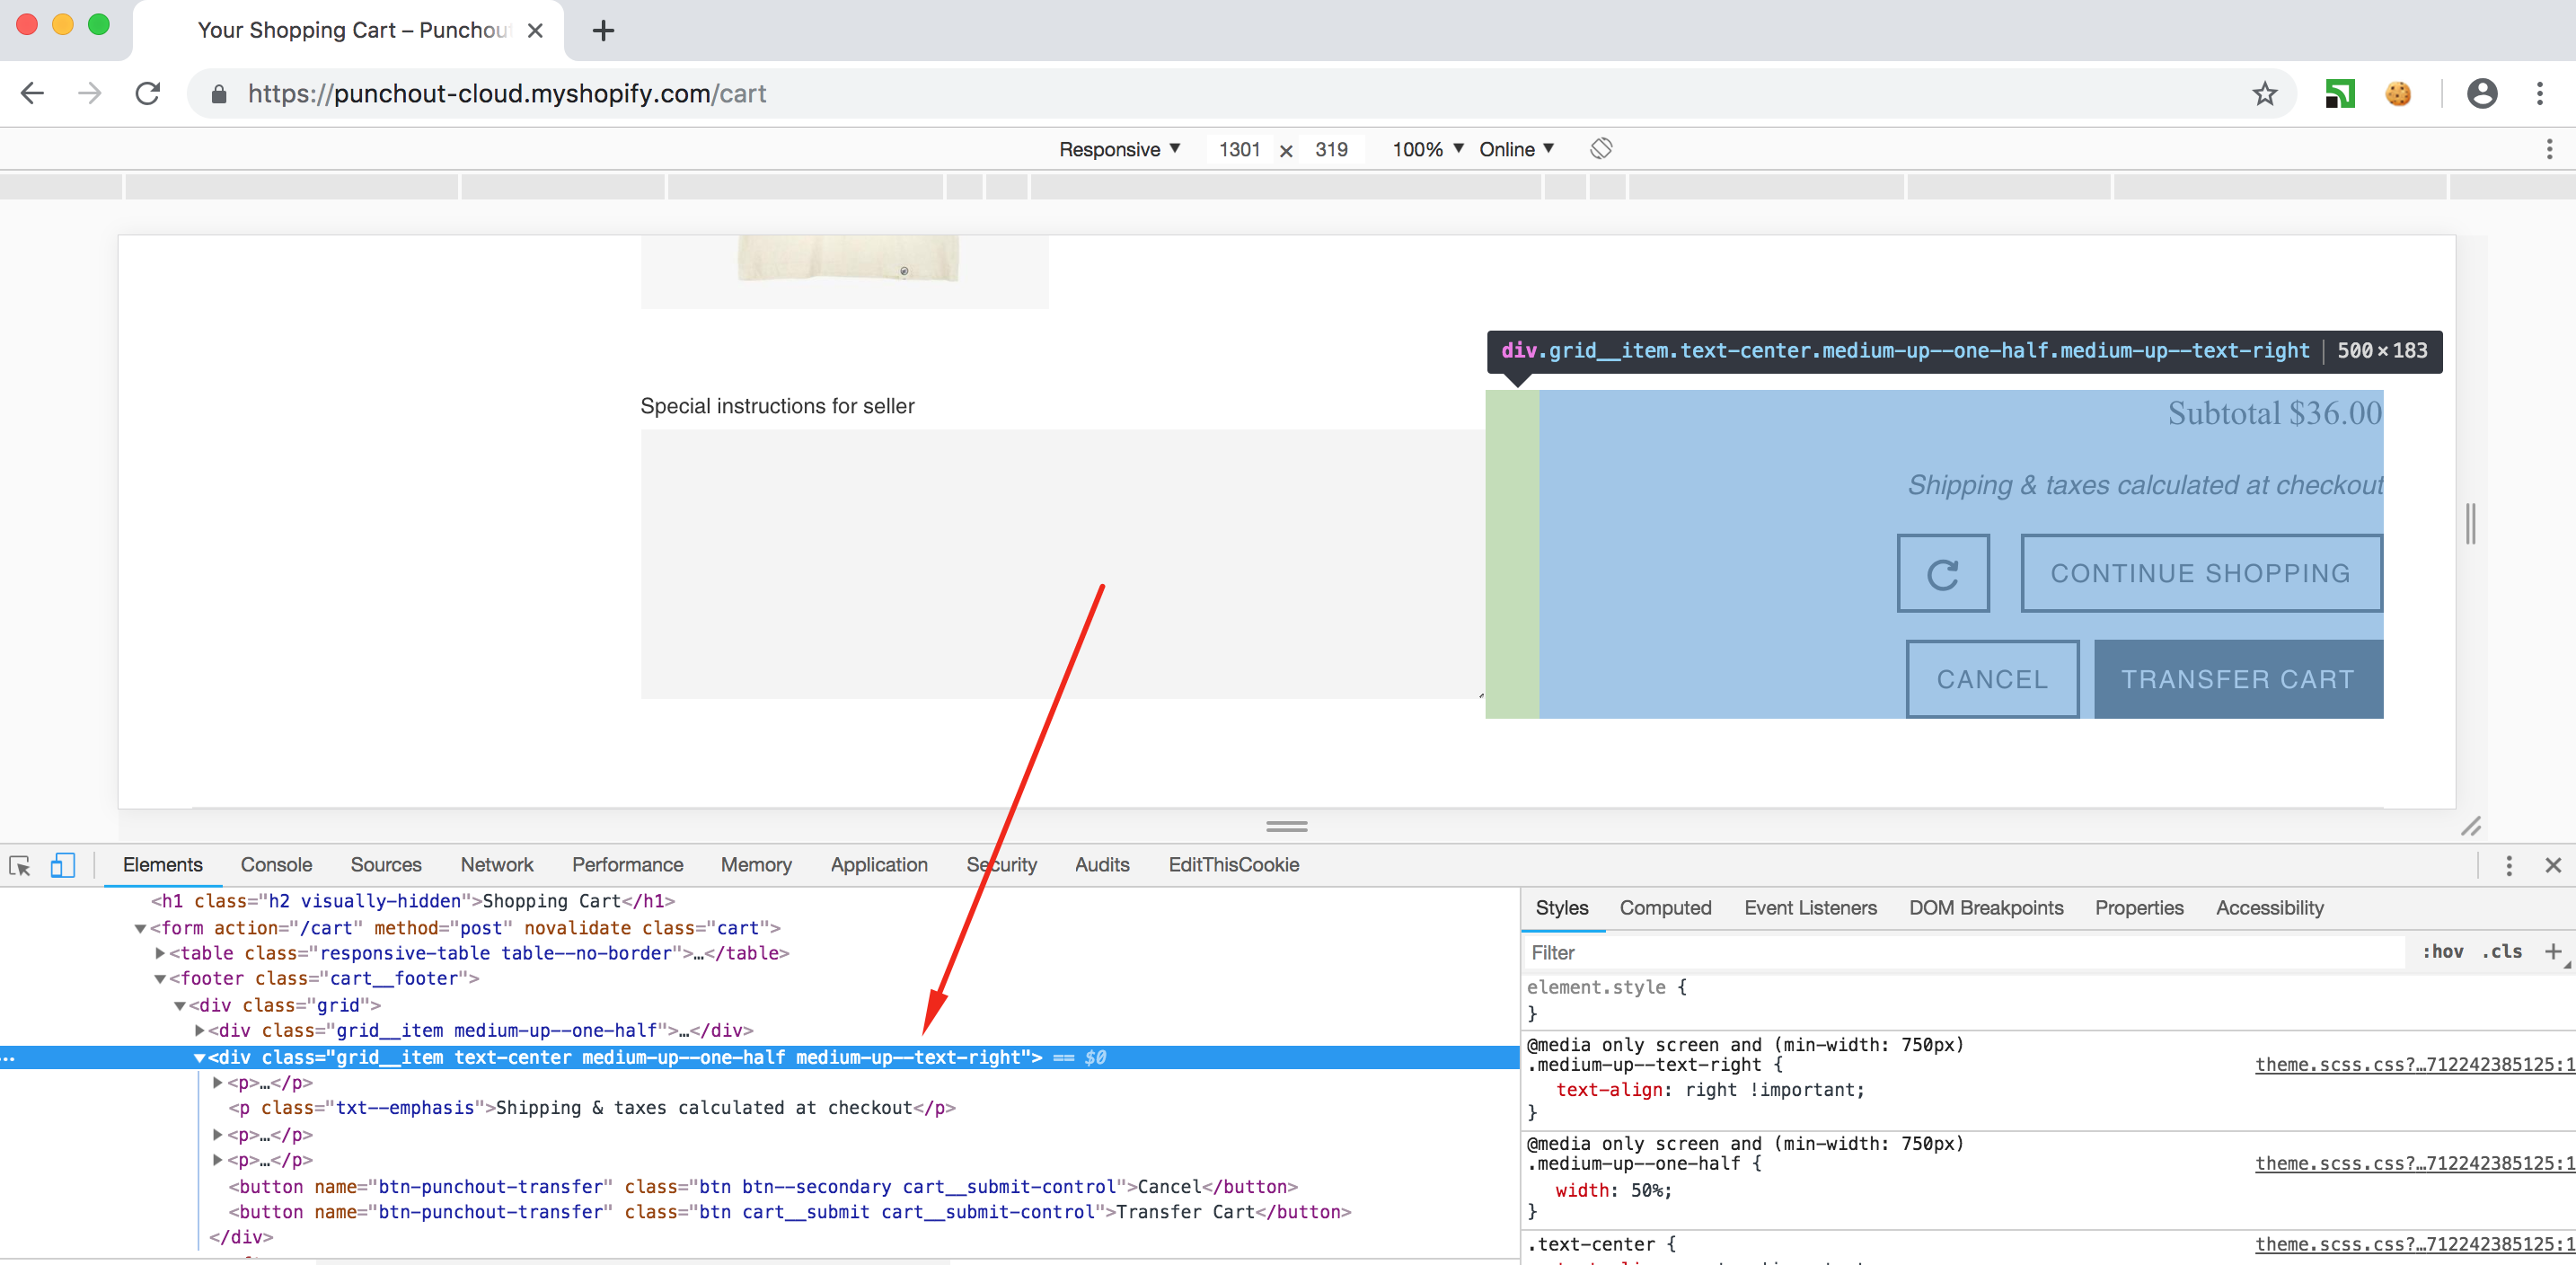
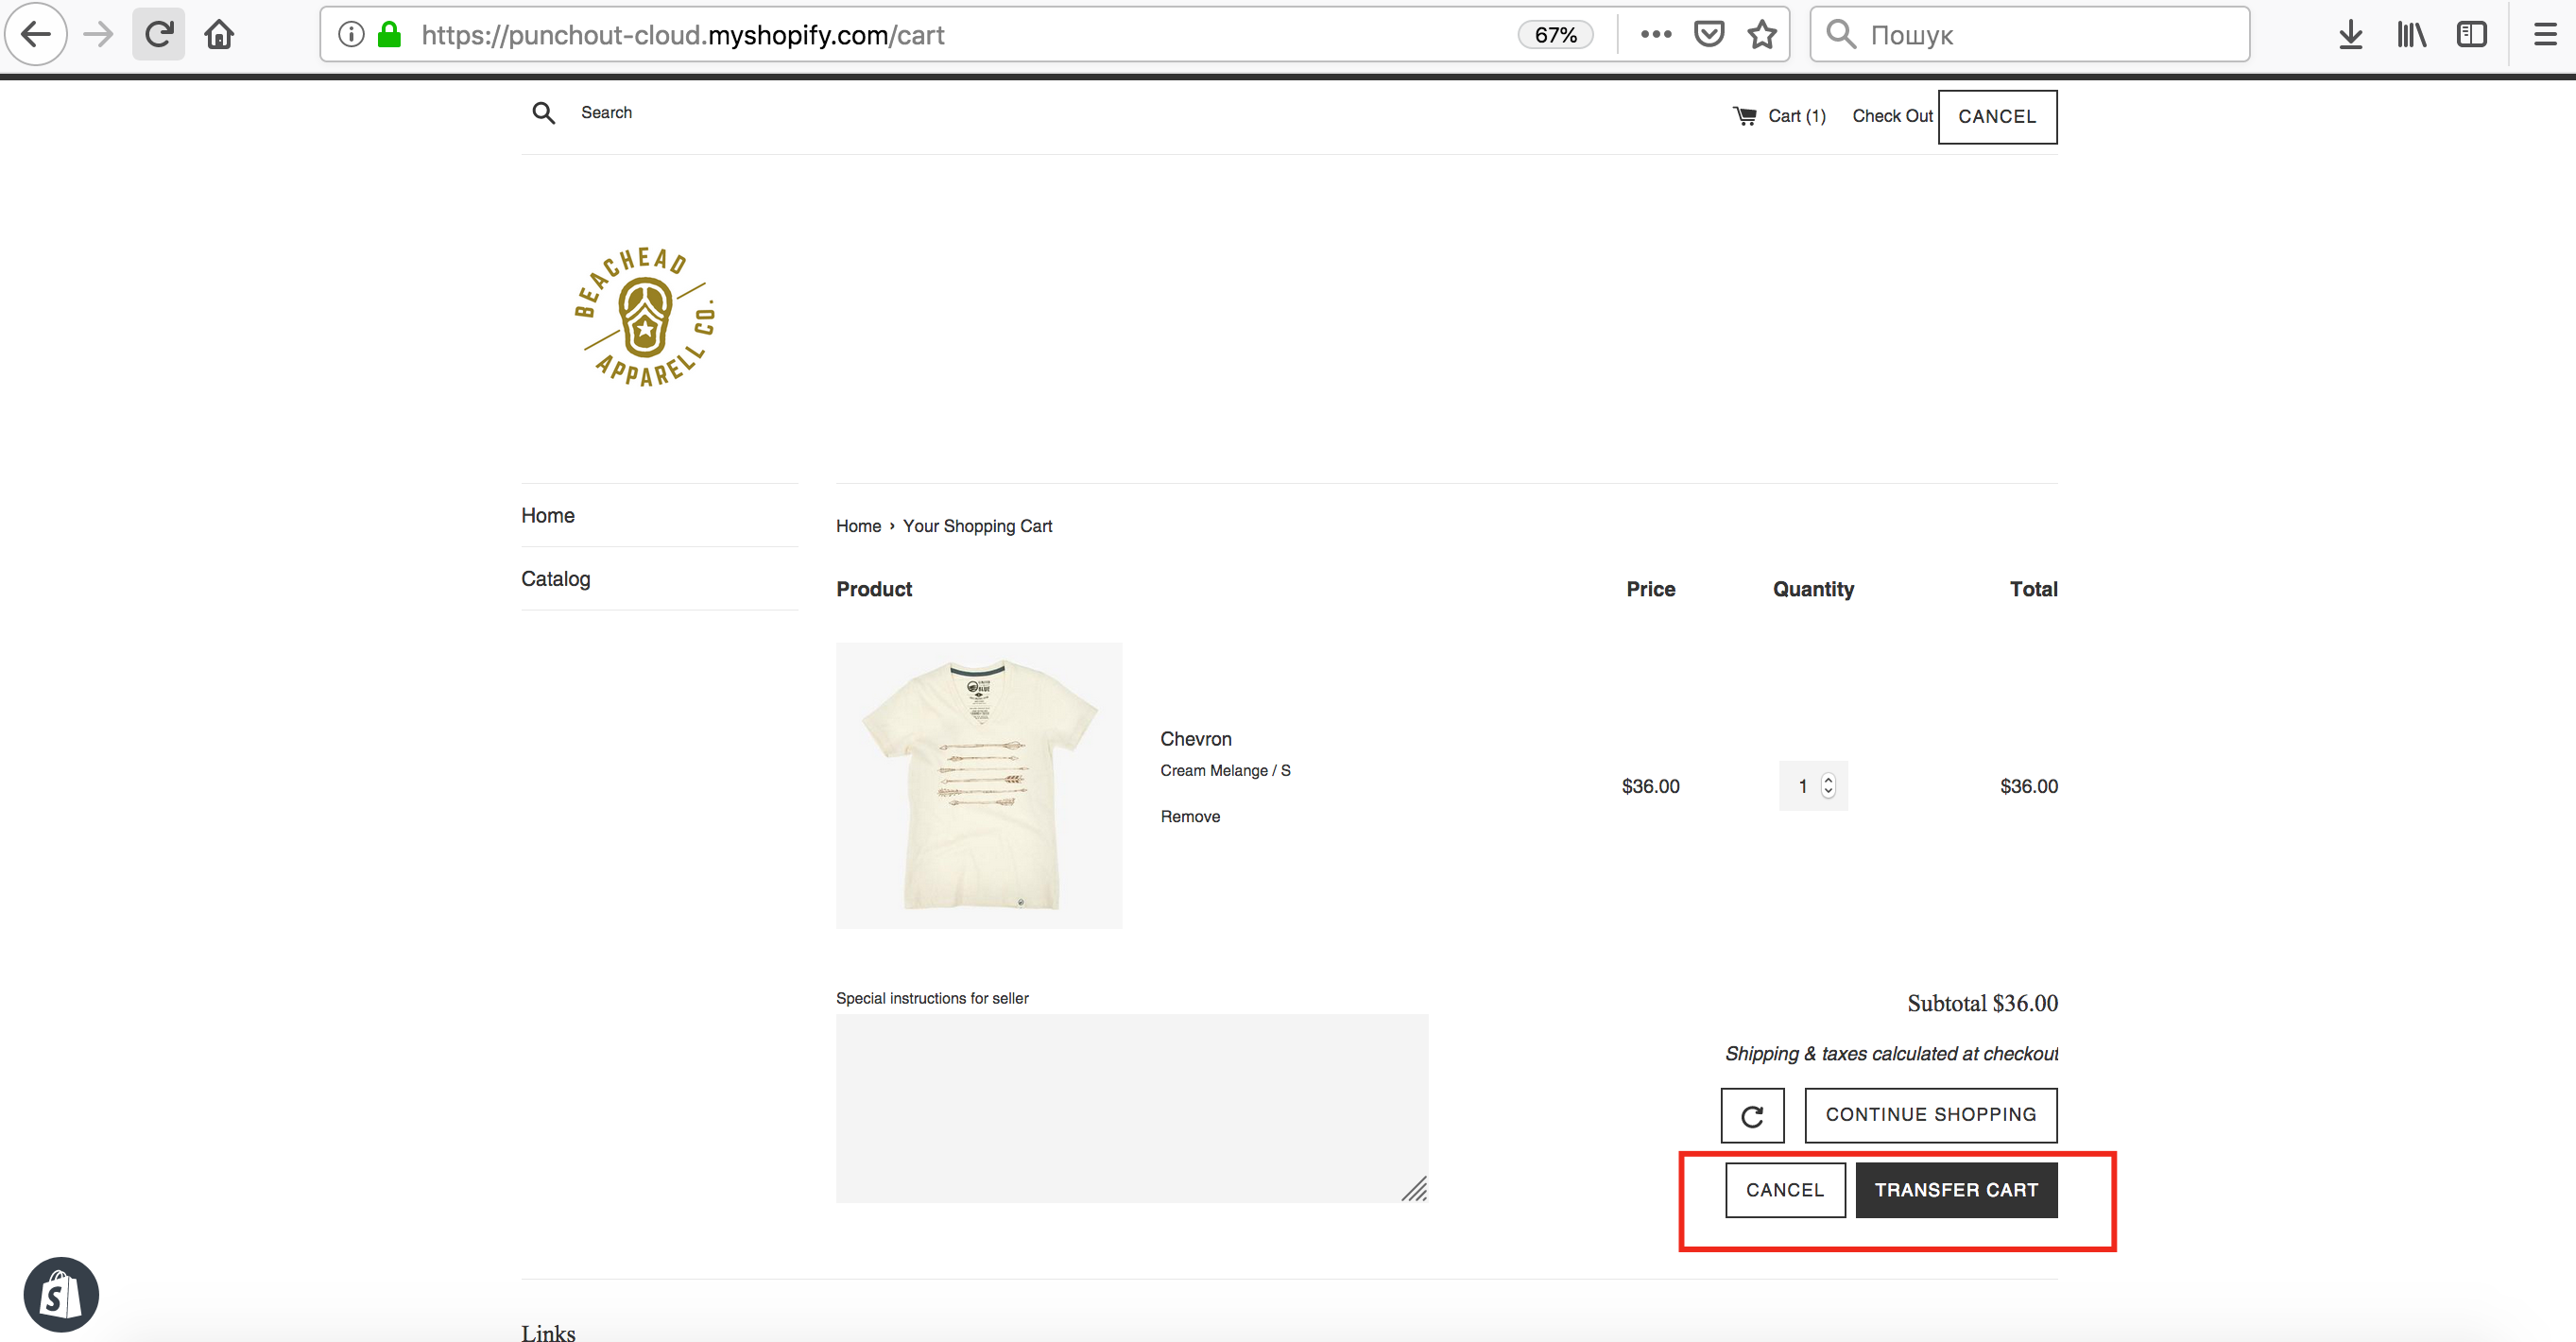
Once the buyer has visited Shopify store in Punchout Session, the user should see new Shopping Cart buttons labeled Cancel and Transfer Cart. If these button don't appear - it can be troubleshooted using Session Test, Theme Customization or Customization Config.
Session Test
To confirm a successful Punchout Cloud integration, we can simulate a session and check if the application is working correctly. In order to test, open a new window in your browser and open inspector console, then enter URL: https://your_shopify_store.myshopify.com/?punchout_sess_id=12345678901234567890123456789012
Where punchout_sess_id is simple string, consists from 32 symbols.
If Punchout Session has been successful, you’ll expect to see the Punchout Session has initialized message in Console:
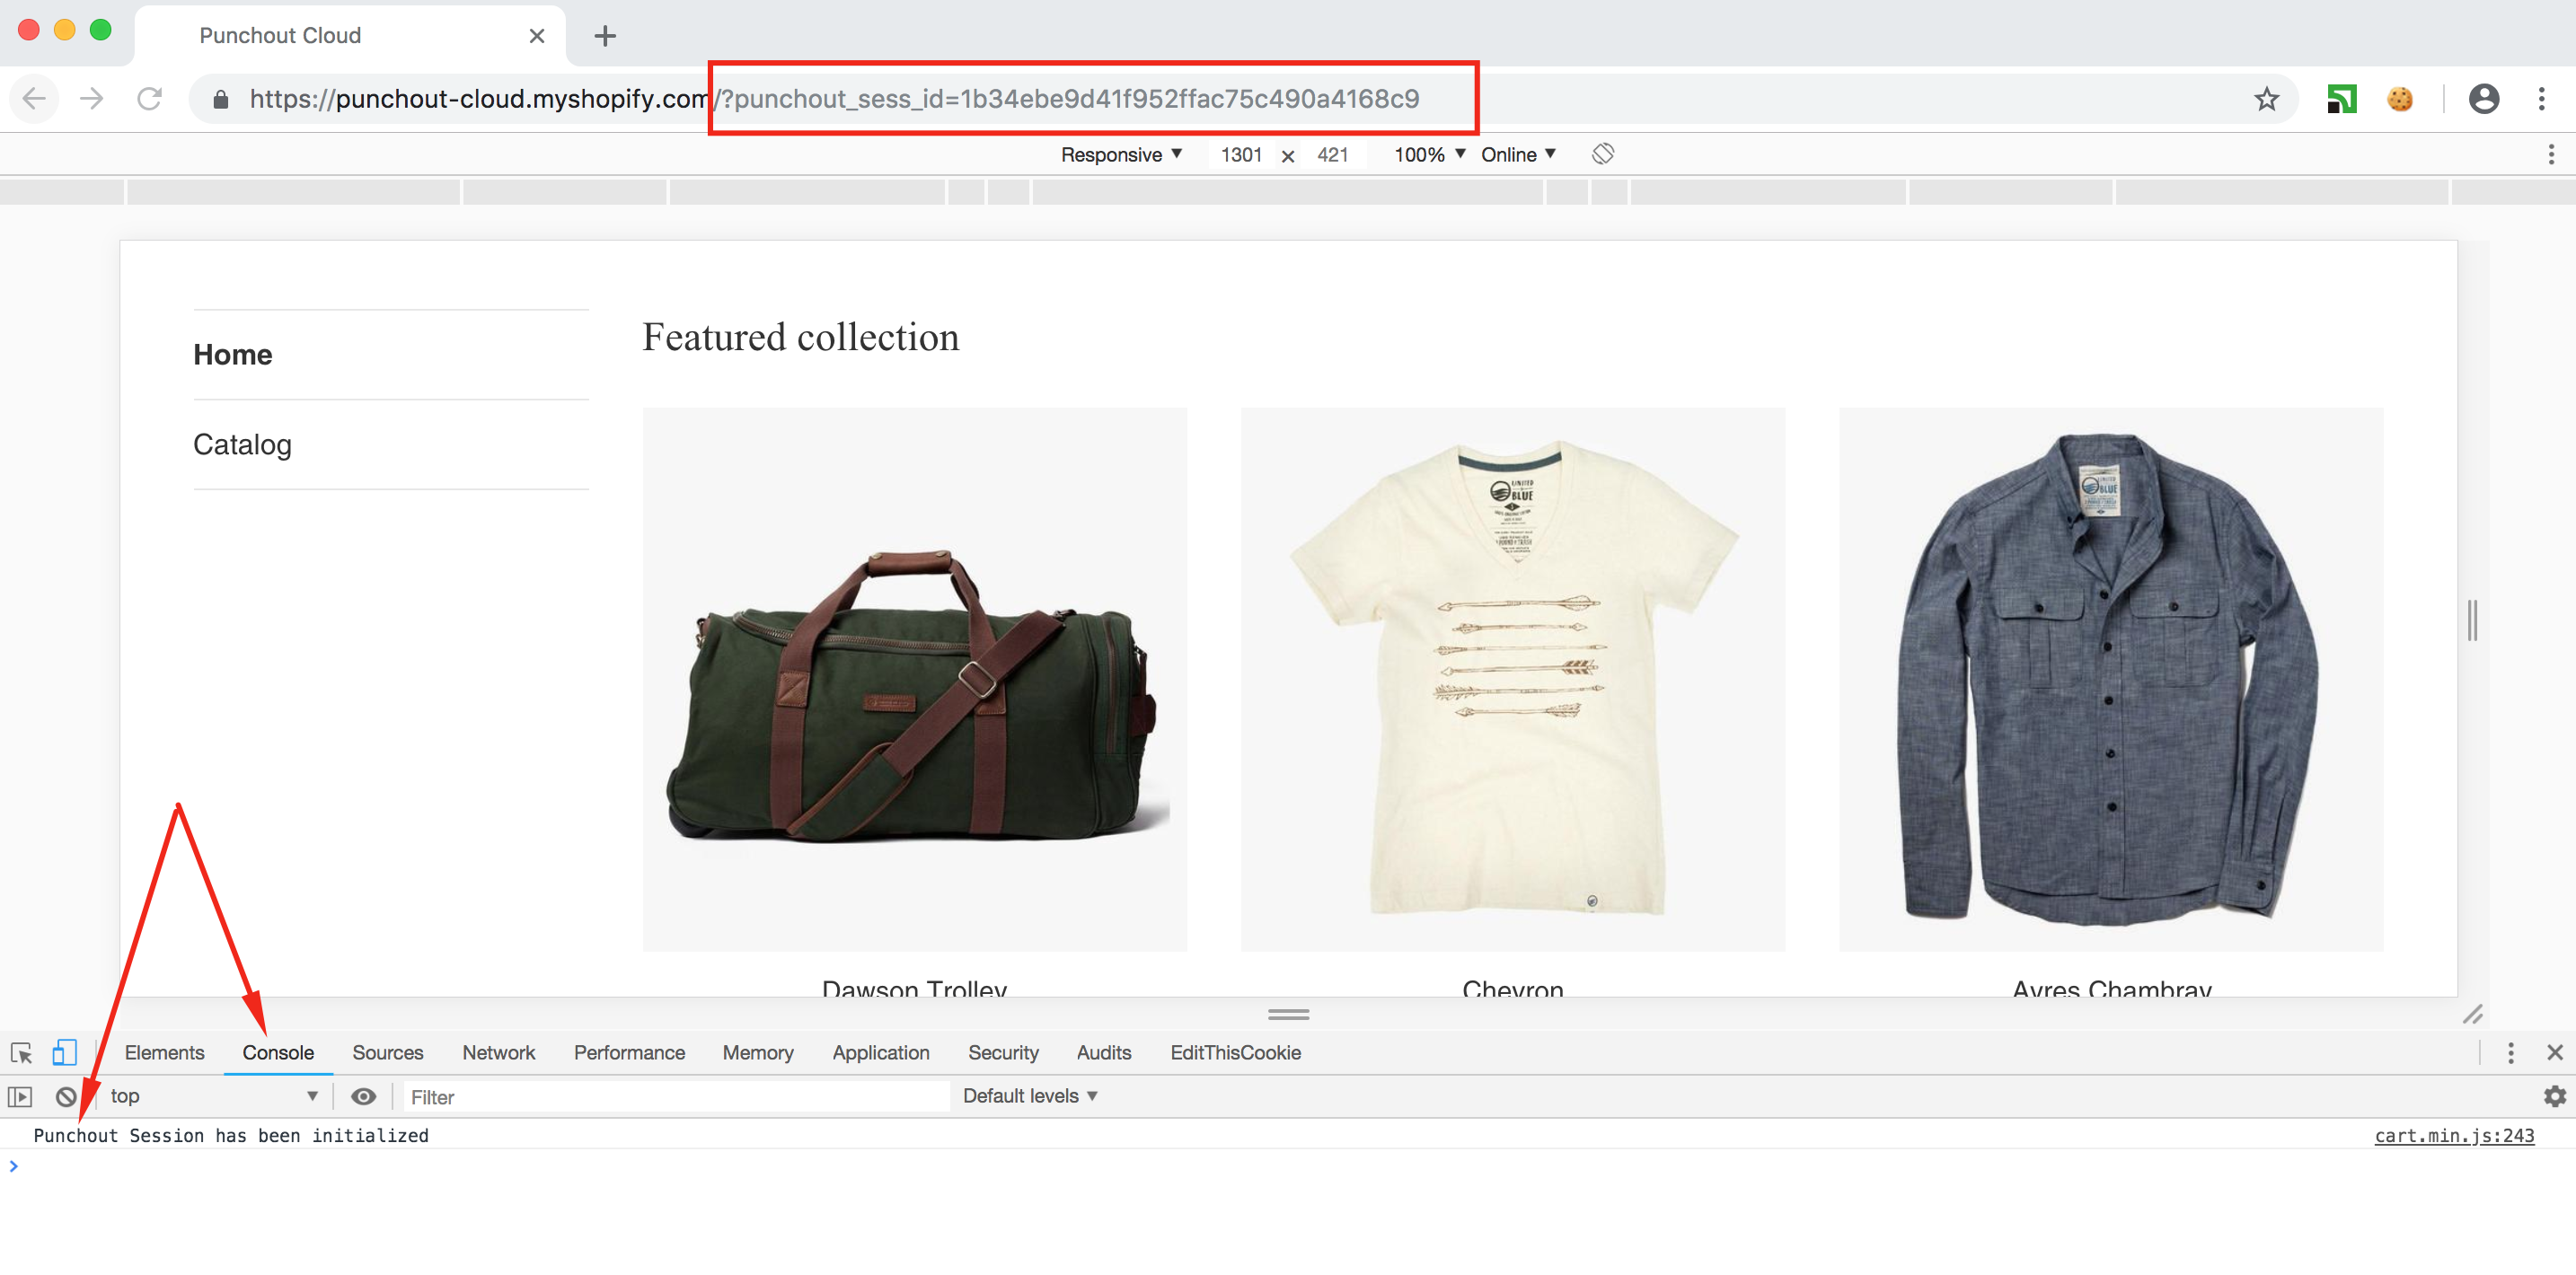
If this message does not appear - it is required to follow Theme Customization section.
Theme Customization
If punchout_sess_id does not trigger the Punchout Session and no message has been initialized message in Console, you need to verify if Punchout Cloud integration has been complete successfully.
First, review Source HTML of Shopify Store and make sure Punchout Cloud piece exists if HTML has been injected into HTML page.
<!-- Punchout Cloud -->
<script src="//shopify.cloud.punchoutexpress.com/settings.js?store=c0323eea8e6f59cd26577092cc585faa"></script>
<script src="//cdn.cloud.punchoutexpress.com/cloud/assets/0.1.0/punchout-merged.min.js" defer="defer"></script>
<script src="//cdn.cloud.punchoutexpress.com/cloud/assets-shopify/0.1.0/cart.min.js" defer="defer"></script>
<!-- /Punchout Cloud -->
Here is example how to define it:

Note
If Punchout Cloud HTML has been defined on your theme page’s HTML on Store Front, then take a look at Customization Config section. In other cases - please, continue reading current section to define the problem and fix the issue.
Login to Shopify admin panel and navigate to Sales Chanel -> Online Store -> Themes -> Current theme -> Actions -> Edit Code.
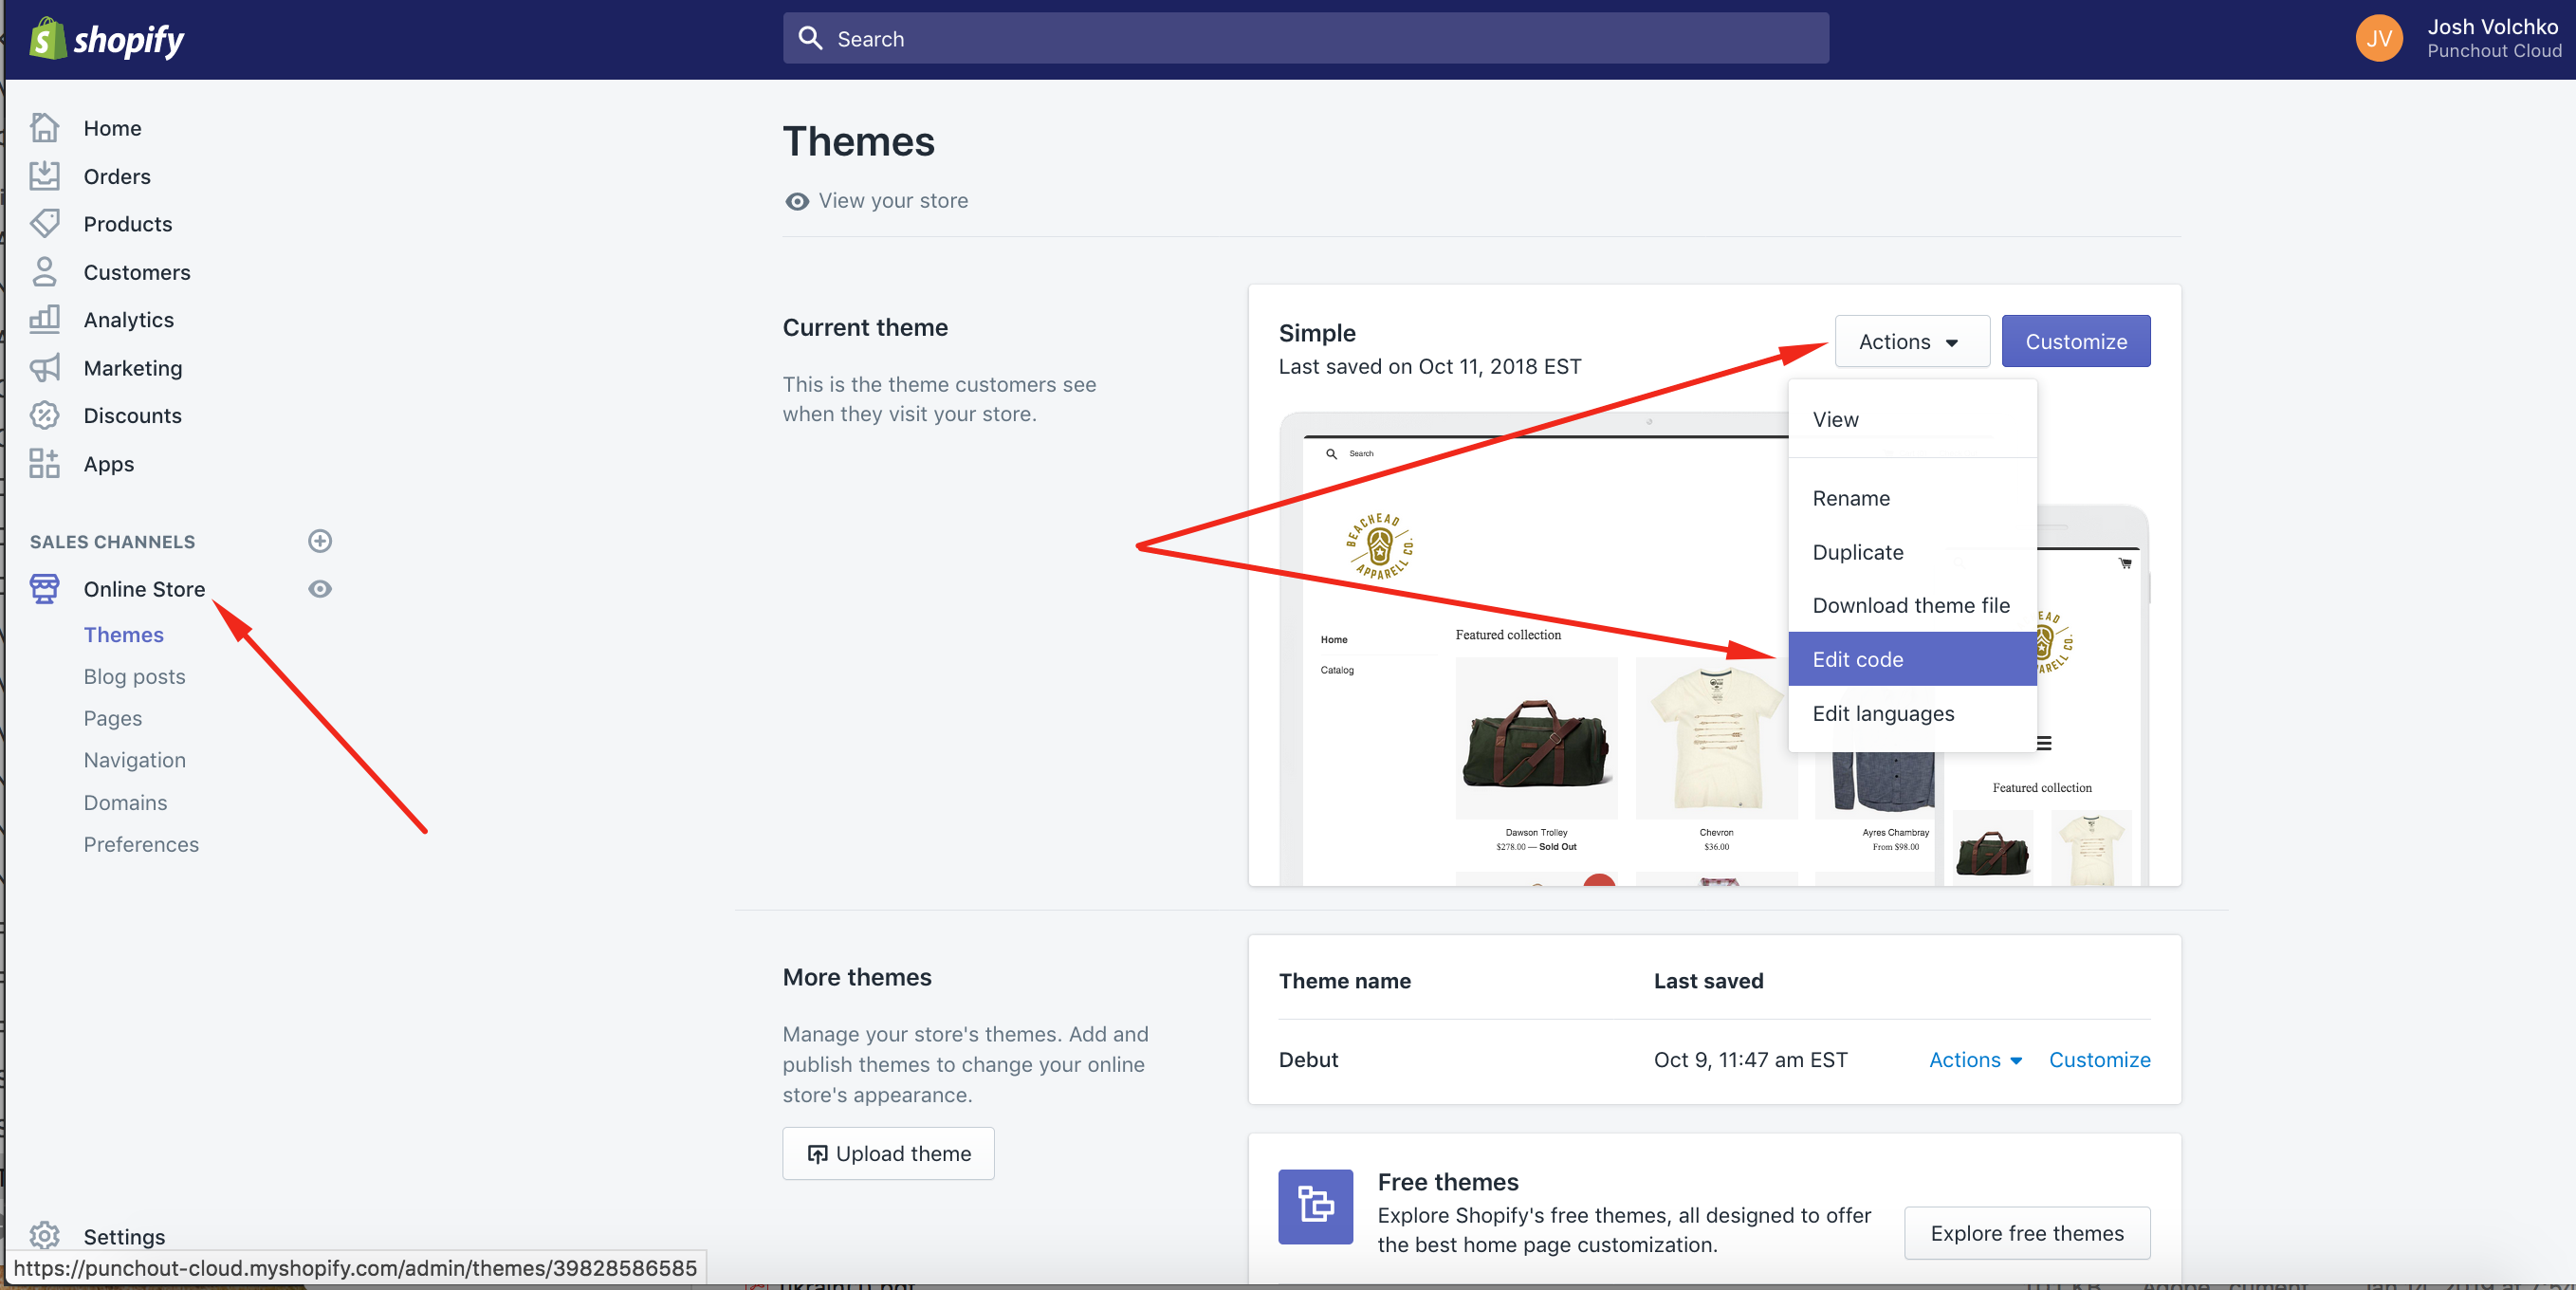
In Code Editor need to pick theme.liquid in Layout section and verify if punchout snippet has been injected before the ending </head> HTML tag.
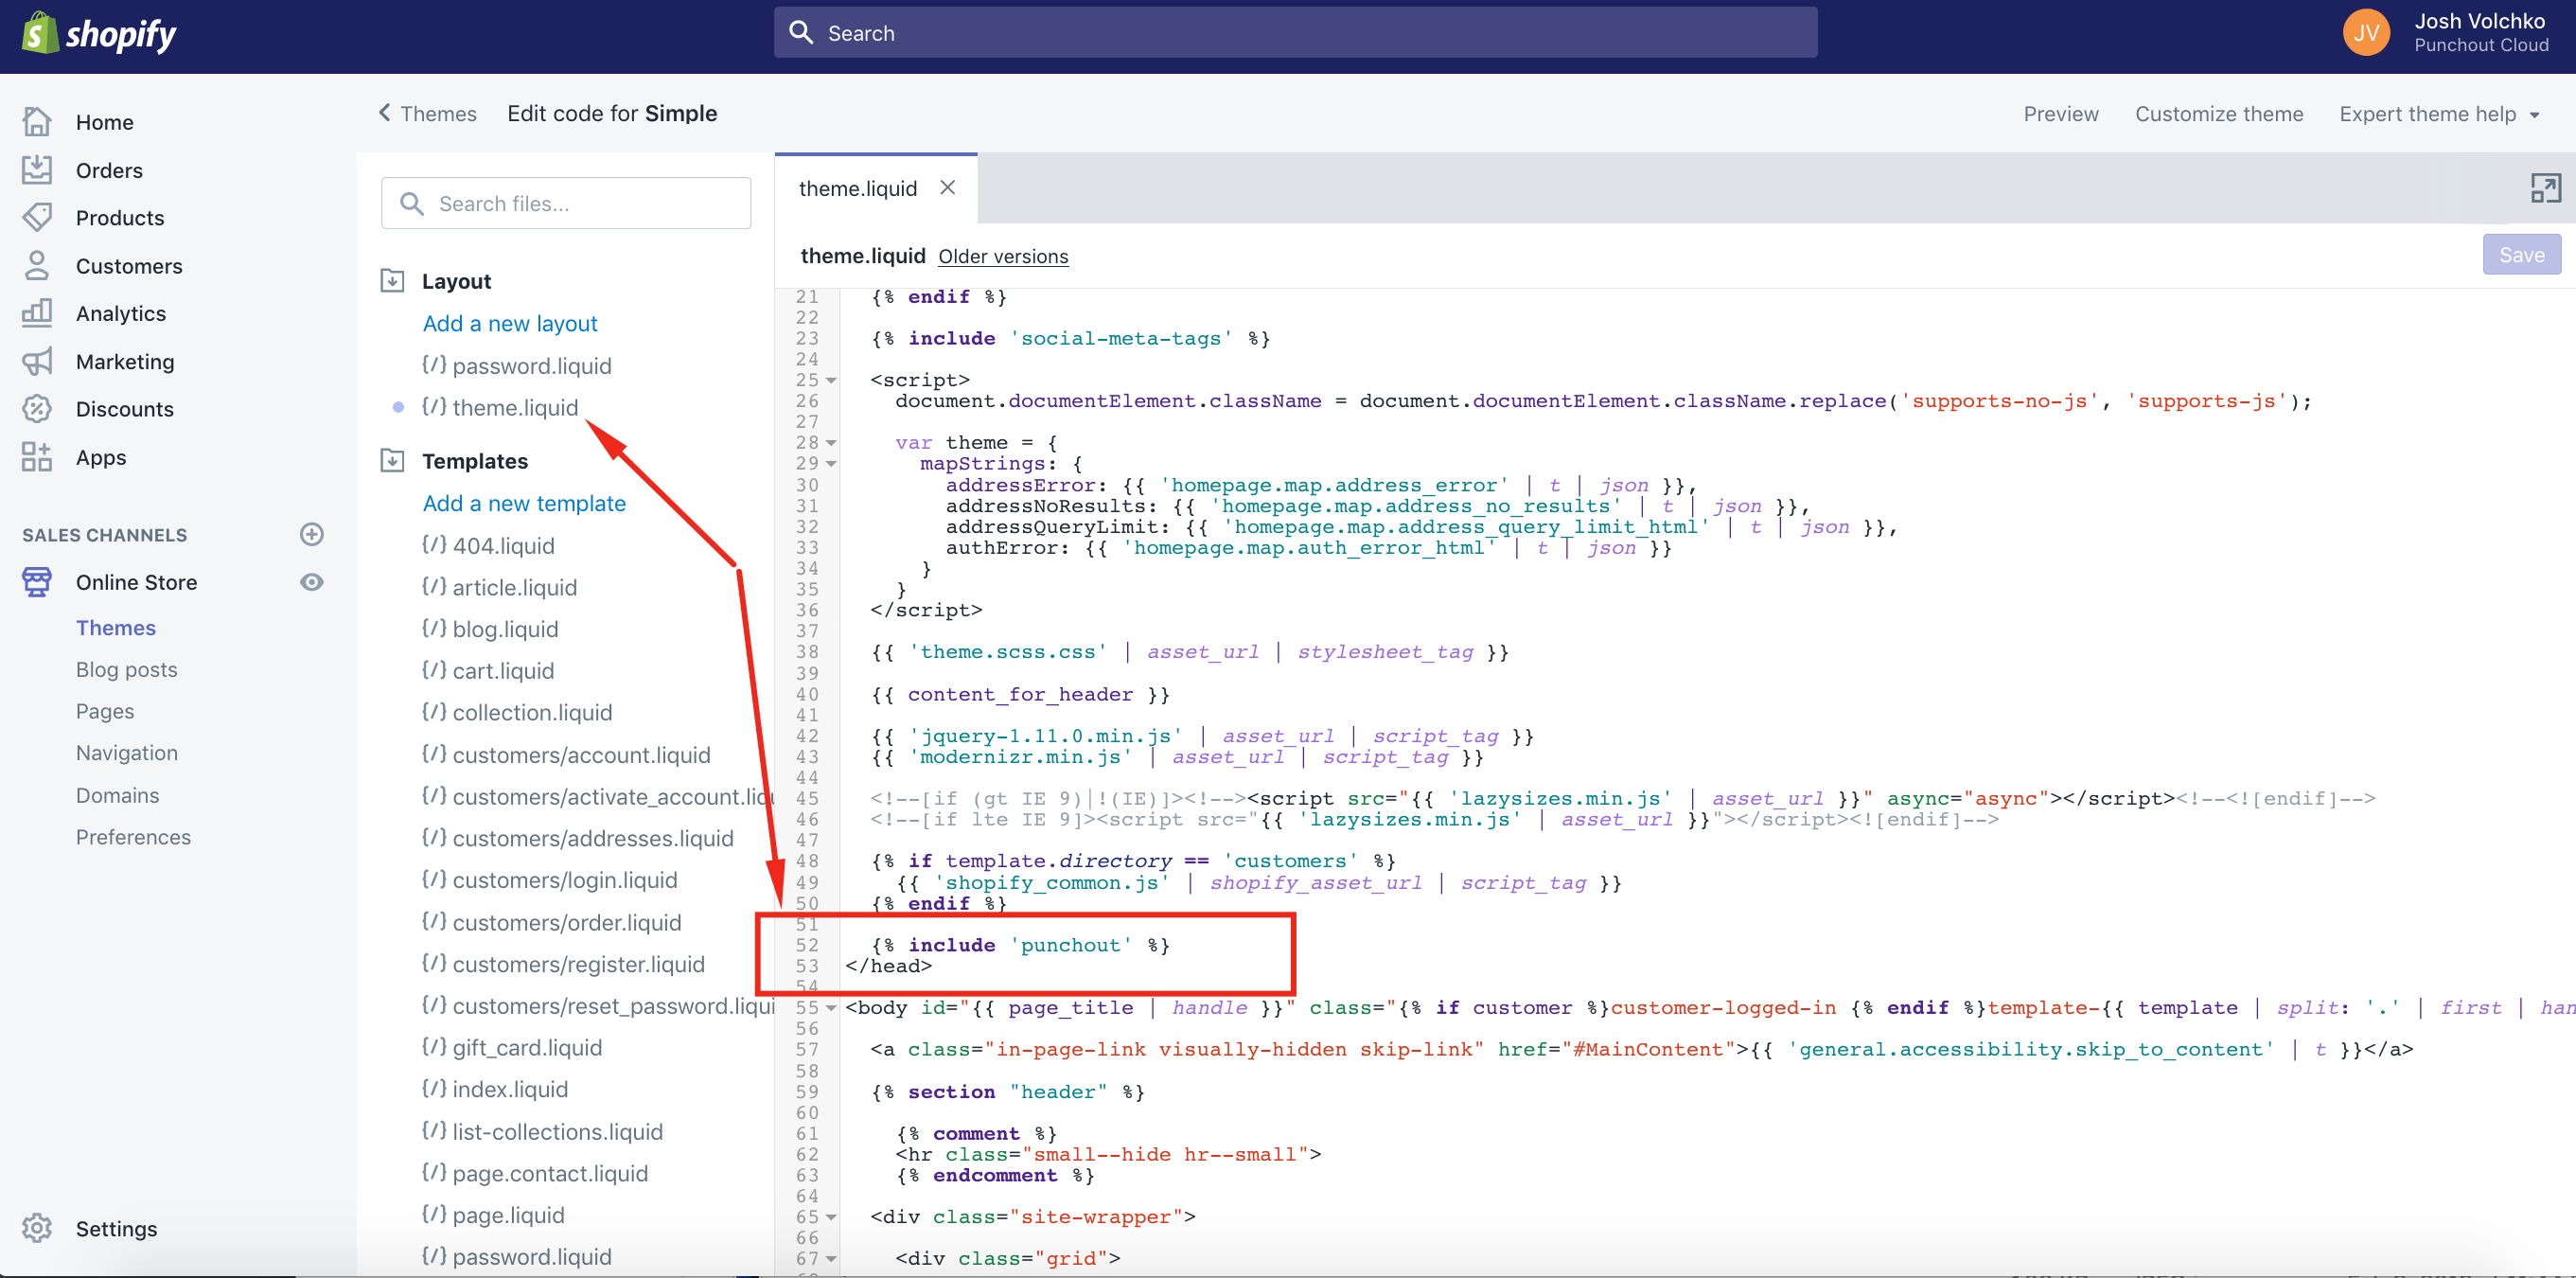
{% include 'punchout' %}
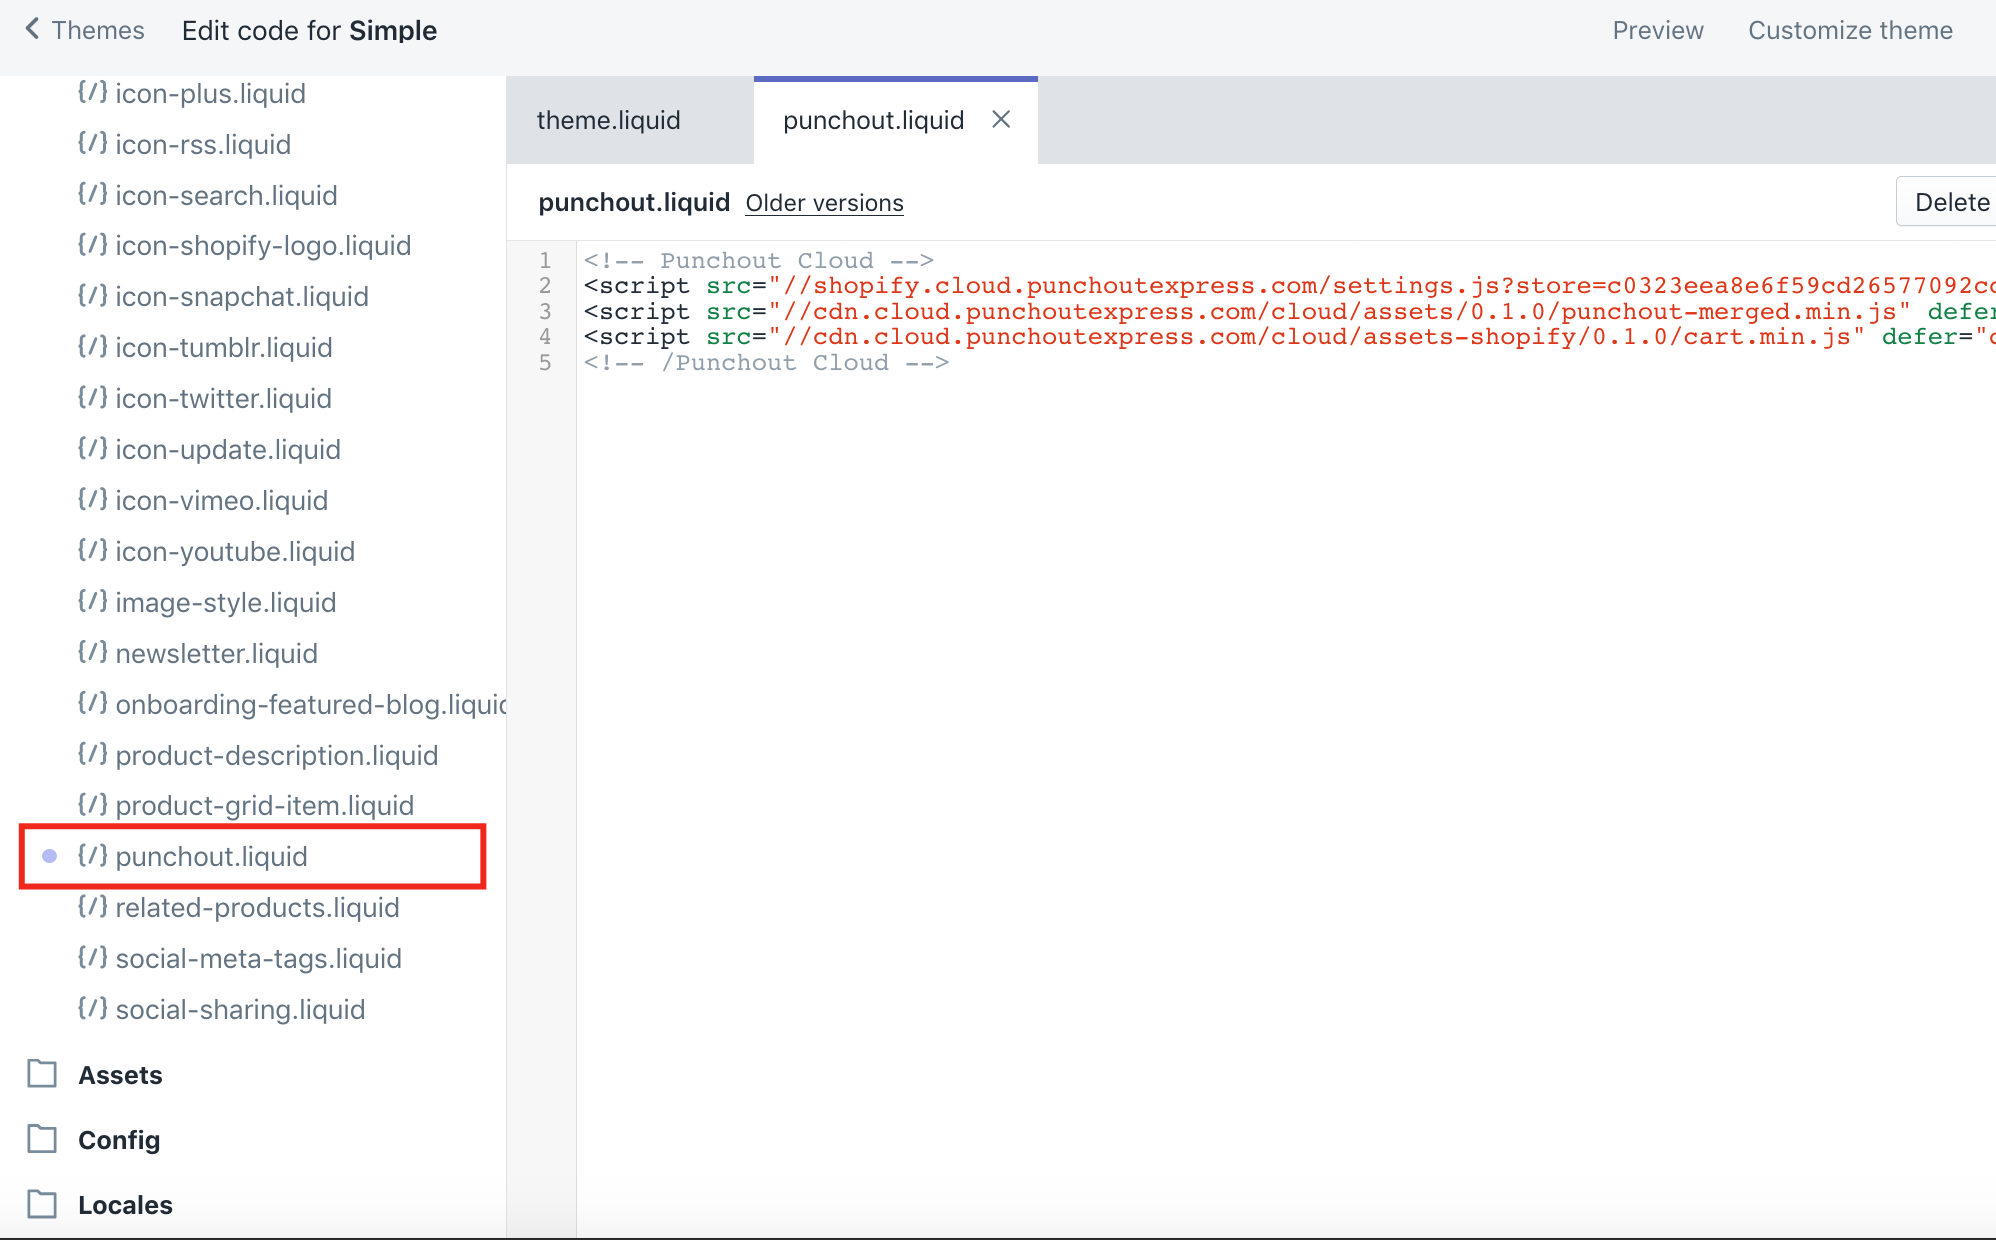
Also need check in punchout.liquid exists in Snippets section of your custom theme.
Note
If the punchout.liquid snippet does not exists - need to re-install Punchout Shopify Application or contact us for technical assistance.
After theme.liquid and punchout.liquid are verified please repeat review source HTML.
Customization Config
By default, the punchout application for Shopify provides support for Simple and Debut themes. If you are using a custom theme and don't see Cancel and Transfer Cart buttons in Punchout Session, then need to update Transfer Cart Button Container Selectors and Cancel Button Container Selectors. You’ll need to hide some elements in Punchout Session, then need to edit Punchout Hide Elements Selectors additionally. Here Element Container is a usual JS/HTML xPath to a target HTML container, where is expected to place new buttons.
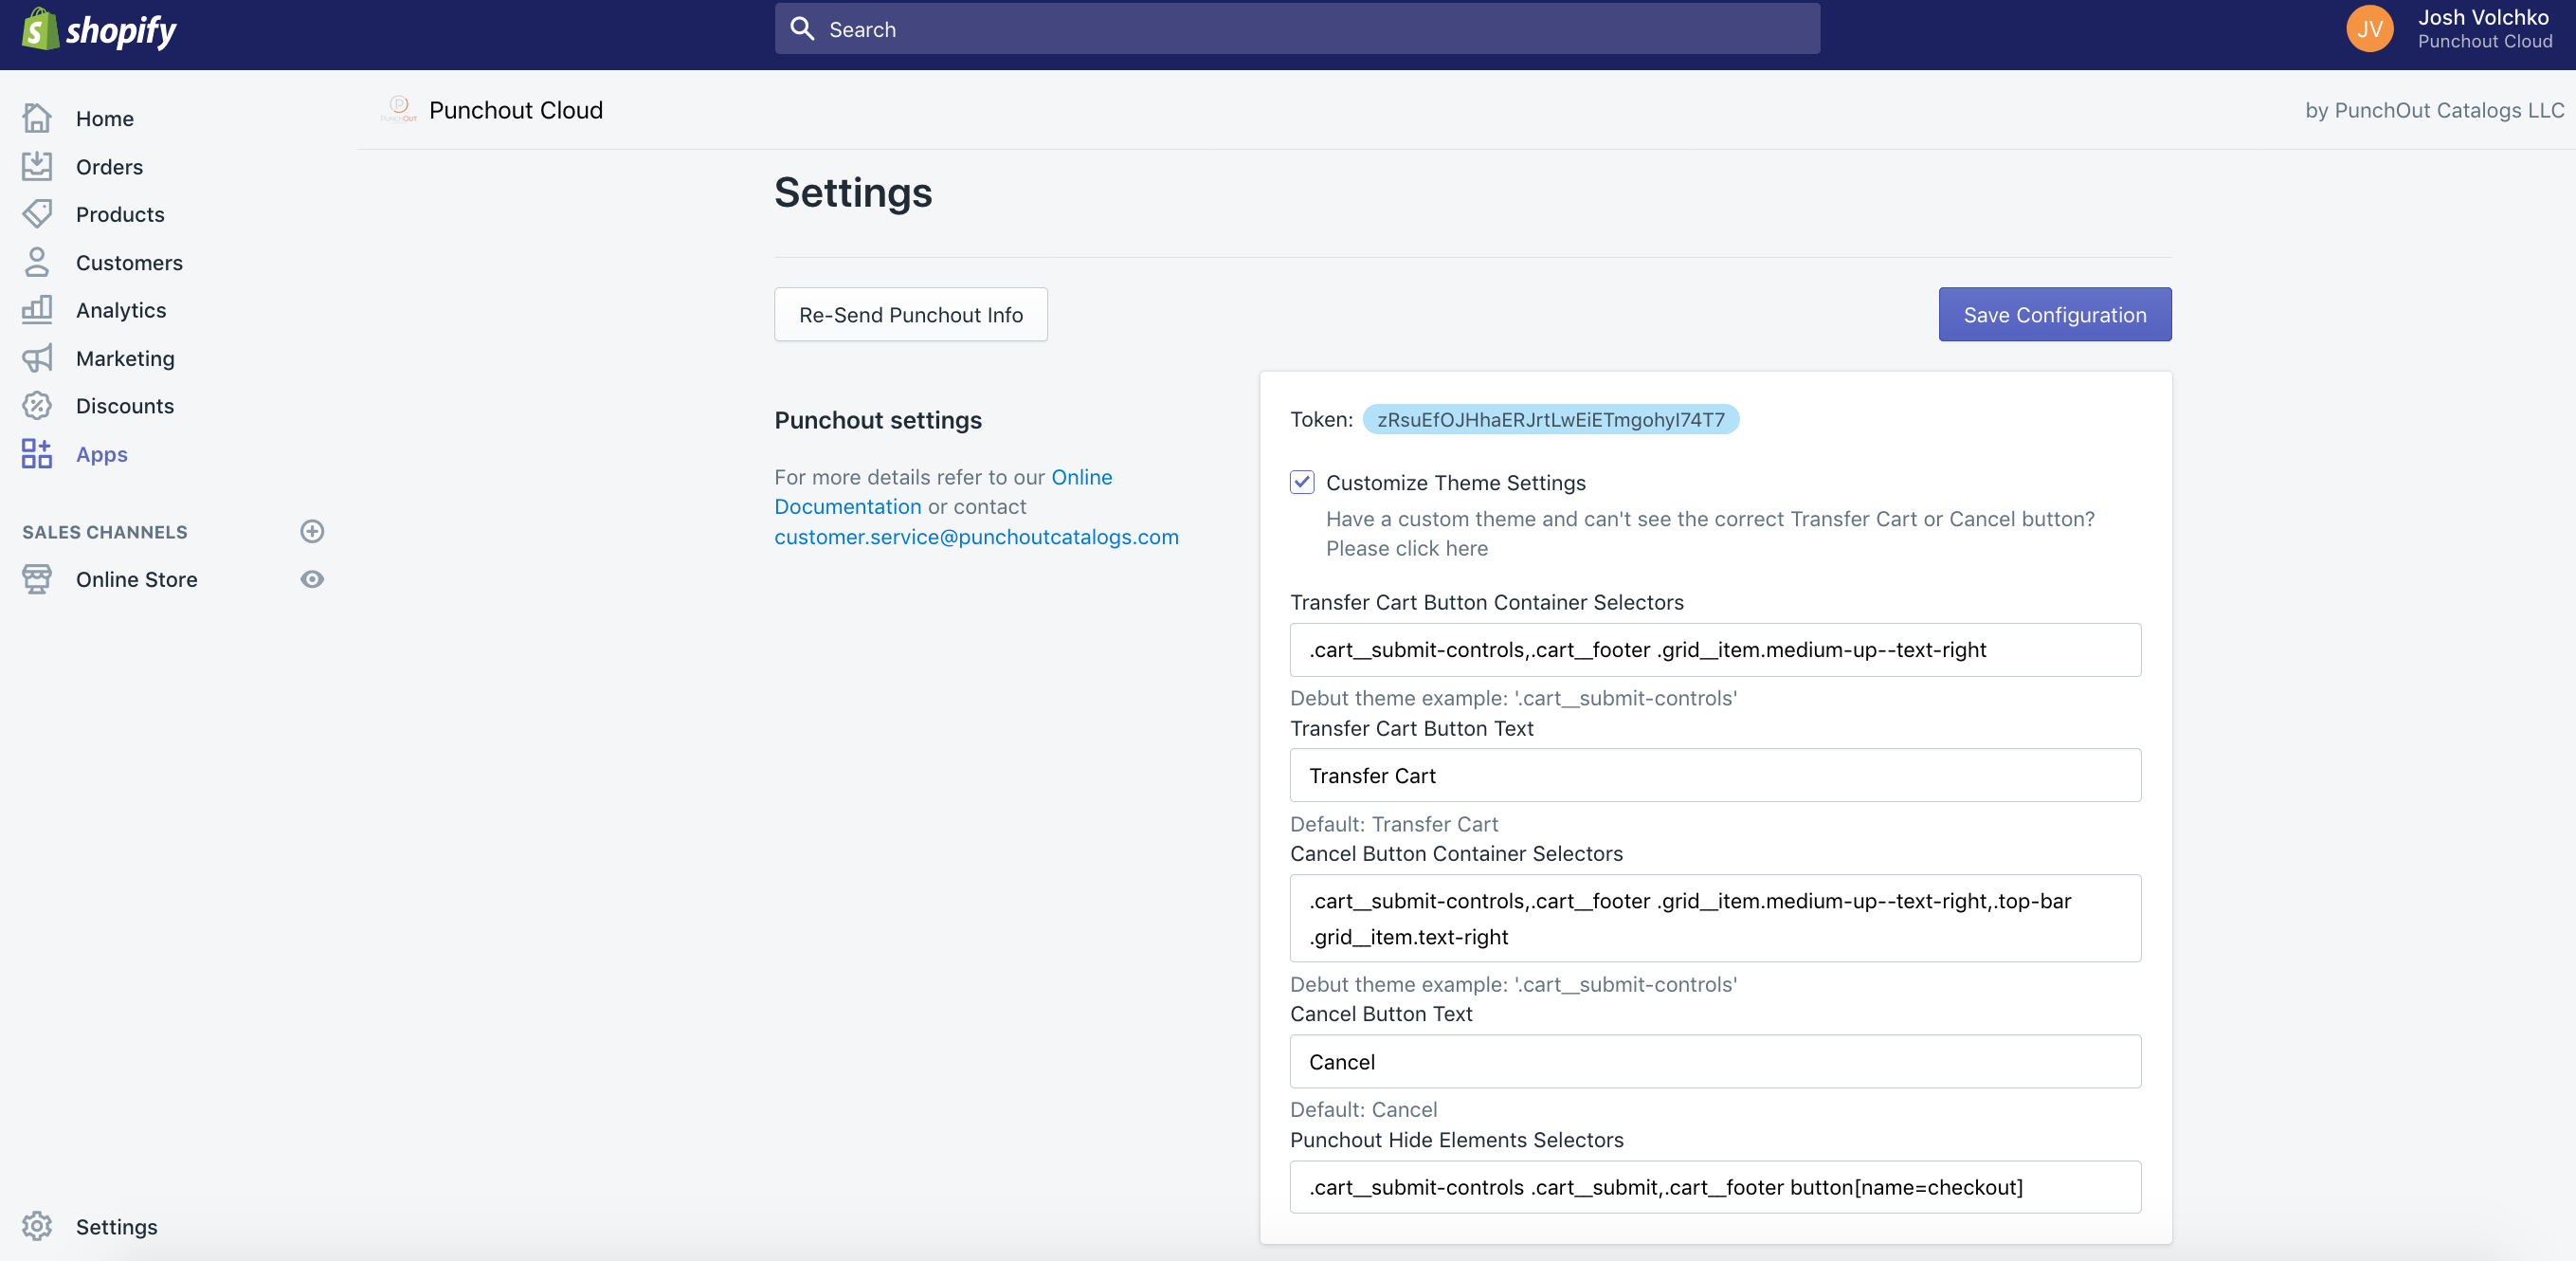
Take a look at an example of how to get a Container Selector using Chrome browser and it's embedded Element/Html Inspector.
